

If it’s one thing everyone does on their smartphones, it’s taking screenshots. Screenshots come in handy for a wide variety of purposes, including capturing what someone might have said to hold it against them at a later time (don’t worry, if you do that often, we won’t judge). And if you’ve picked up the Galaxy Note 10 or Note 10+ and are wondering how you can take screenshots on your shiny new flagship, we’re here to help.
There are multiple ways to take screenshots on Samsung phones and there are also multiple avenues to edit those screenshots after the fact. First, let’s look at the basic process of capturing screenshots, and then we’ll get into the more interesting stuff.
How to take a screenshot on the Galaxy Note 10
Volume down + power button method
This is the standard method for taking screenshots on both Samsung Galaxy smartphones and Android devices in general. All you need to do is press the volume down and power buttons together when the content you want to capture is on-screen. You don’t need to press and hold the buttons – just press them once as a long press of the buttons will bring up the power off menu. The screen will flash to confirm that the screenshot has been captured.
A popup at the bottom of the screen after the screenshot has been captured will let you instantly share it with other apps, draw on it, and add tags to it so you can easily sort screenshots based on those tags in the Gallery app. The popup will go away after a few seconds, after which you can access the screenshot from the Gallery app or from the notification shade.
Palm swipe to capture method
This is another age-old trick for saving screenshots on Samsung phones, and it’s available on the Galaxy Note 10 and Note 10+ as well. What you need to do is place your hand vertically along the right or left edge of the screen — just like you would if you were attempting to karate chop the phone — and then swipe all the way to the other end. Once again, the screen will flash to confirm that the screenshot has been saved, and you will be able to share and edit it instantly and also find a notification for it in the notification shade.
Note: The palm swipe feature is enabled by default, but if you would like to disable it, open the Settings app on the phone, select Advanced features, navigate to the Motions and gestures section and then toggle the Palm swipe to capture option. However, since the feature doesn’t affect battery life, we would recommend leaving it on.
Capture long screenshots with Scroll capture option
This is an excellent feature that lets you capture more than what you see on-screen in a single image. For example, using Scroll capture, you can capture an entire webpage (like this one), or a long list in some other app, instead of taking multiple screenshots.
How do you take a long screenshot? It’s simple. First, just take a screenshot using the volume and power button combo or the palm swipe method as described above, then, in the popup that shows up at the bottom of the screen, tap the Scroll capture icon (the one with a down-facing arrow inside brackets) multiple times until you’ve captured all you need to capture.

If you’re capturing a long webpage or list, you can tap and hold the Scroll capture icon instead of tapping it multiple times until you’ve reached the end or have captured what you needed to capture. As with regular screenshots, a long screenshot can be edited, shared, and tagged after it has been captured and can be accessed in the Gallery app and from the notification shade.
Using Bixby Voice
Bixby Voice can be used to take screenshots with your voice. It can come in handy when your hands aren’t free to follow the standard screenshot capture methods described above or when you’re just feeling lazy.
To take a screenshot using Bixby Voice, just fire it up by pressing and holding the power button or by saying “Hi, Bixby” then say “take a screenshot”. The screen will flash to confirm that the screenshot has been captured. If you used the power button to fire up Bixby Voice, you will have to press and hold the button while saying “take a screenshot” and then let it go so Bixby can perform the action.
Check out the GIF animation below for a visual guide. Tap the animation once if it doesn’t play automatically.
Screenshots captured using Bixby Voice can be edited, shared and tagged like screenshots taken using the other methods described above. However, you cannot capture long screenshots using Bixby.
Note: The first time you press and hold the power button on your phone, you will be asked to set up Bixby and Bixby Voice, which is necessary before the feature can be used for taking screenshots. It’s also needed for using the “Hi, Bixby” command for waking up Bixby Voice without using the power button.
Smart select via Edge screen or S Pen Air Command menu
Smart select is the screenshot method that you should use when you want to capture just part of what’s on the screen instead of the entire screen. You can cut out any custom part of the on-screen content by dragging a finger — or the S Pen — around the part that you want to capture.
You can also decide what shape the final screenshot will be. By default, dragging your finger or S Pen around something will create a rectangular snippet, but you can also create an oval screenshot or just snip something in free flow, which can be great for, say, cutting out someone’s face from a photo and using it as a sticker in WhatsApp. Oh, and you can also create GIFs and pin a captured screenshot to the screen so that it shows up on top of every app until you manually dismiss it.
There are two ways to access Smart select: via the Edge screen panel and via the S Pen’s Air Command menu. The former is more convenient as Edge screen functionality is accessible without having to whip out the stylus, but the latter is where you can find the free form selection option.
Smart select via the Edge screen:
Step 1: For using Smart select via the Edge screen, first you’ll need to make sure the Edge panels feature and the Smart select panel are enabled. You can do this by going into the Settings » Display » Edge screen menu and enabling the Edge panels option. Then, tap the Edge panels text and tick the circle over the Smart select option.
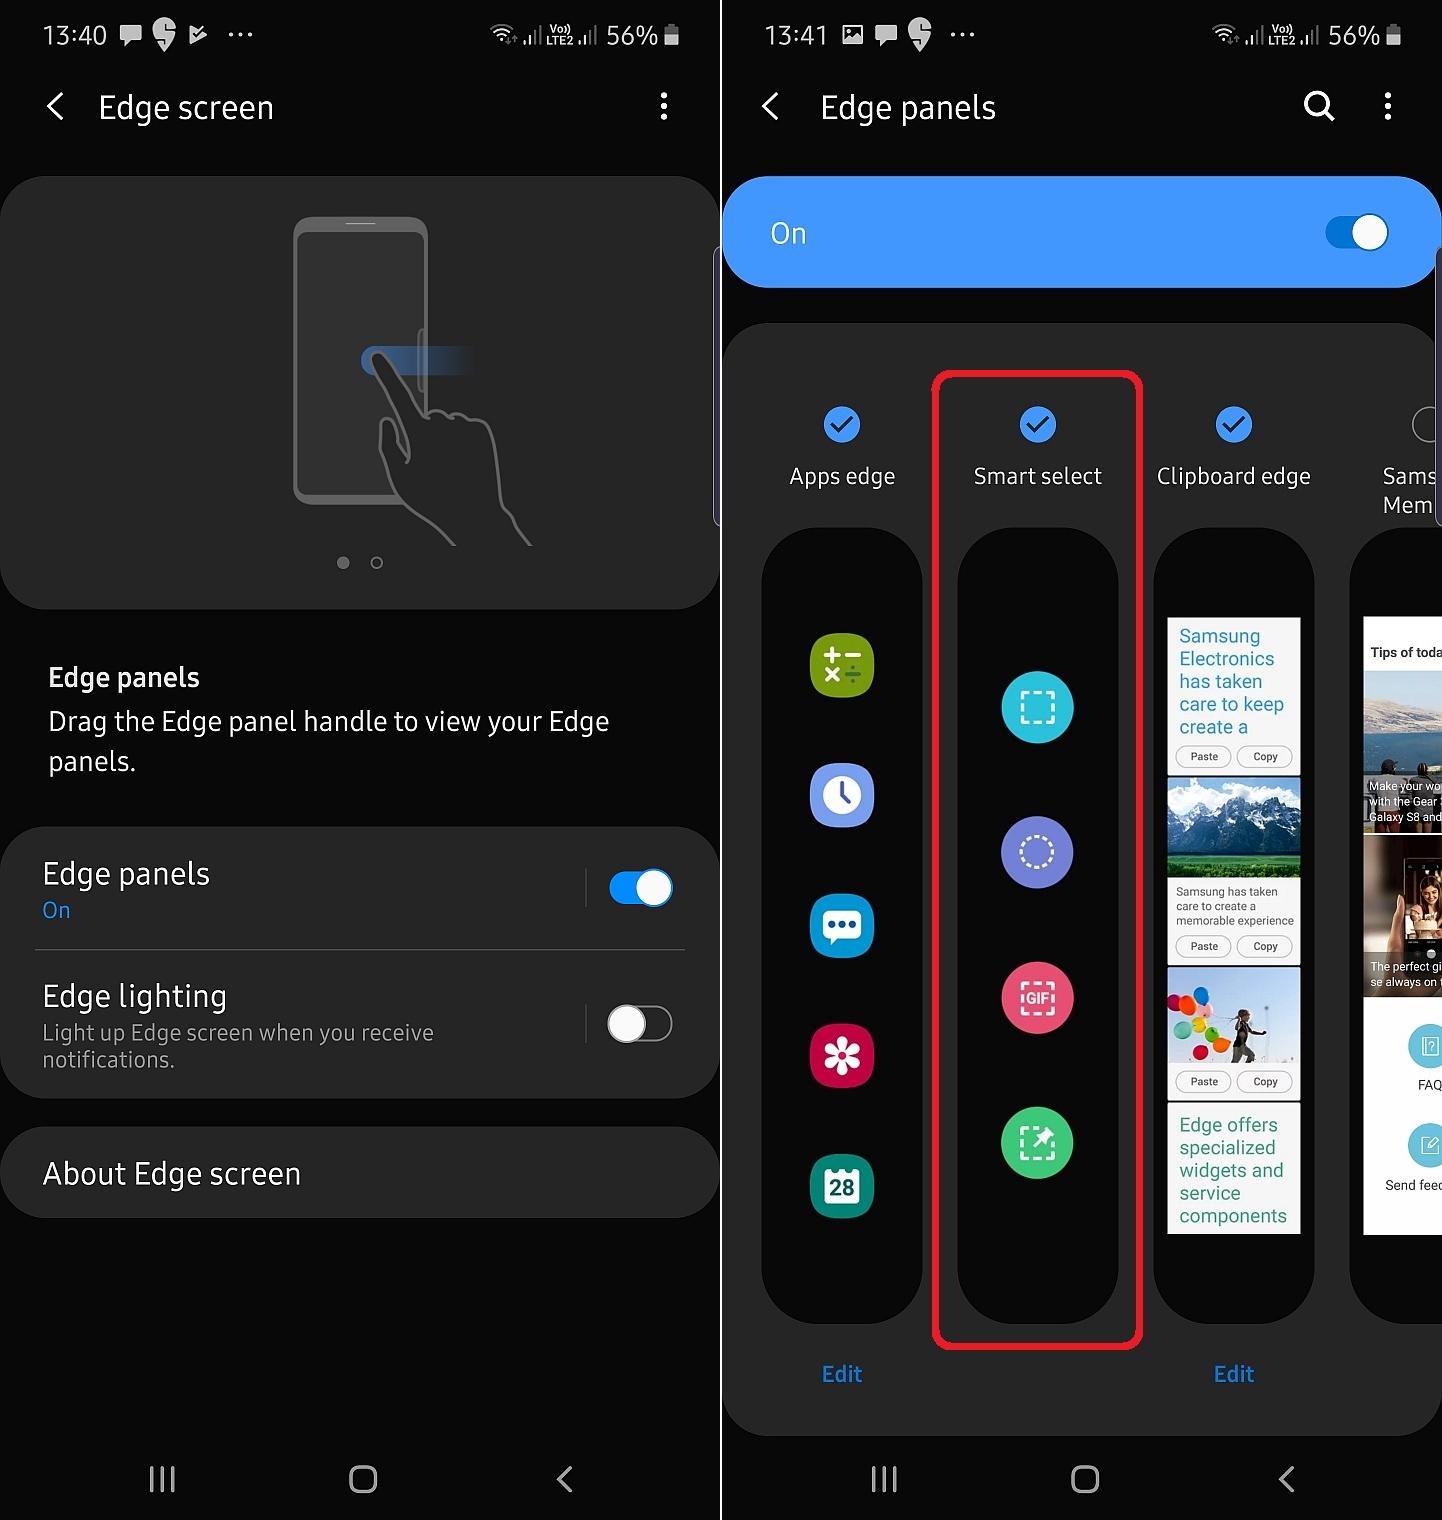
Step 2: Now, open the content you want to screenshot, and open the Edge panel by swiping in from the right side of the display. Then, keep swiping until you reach the Smart select panel.
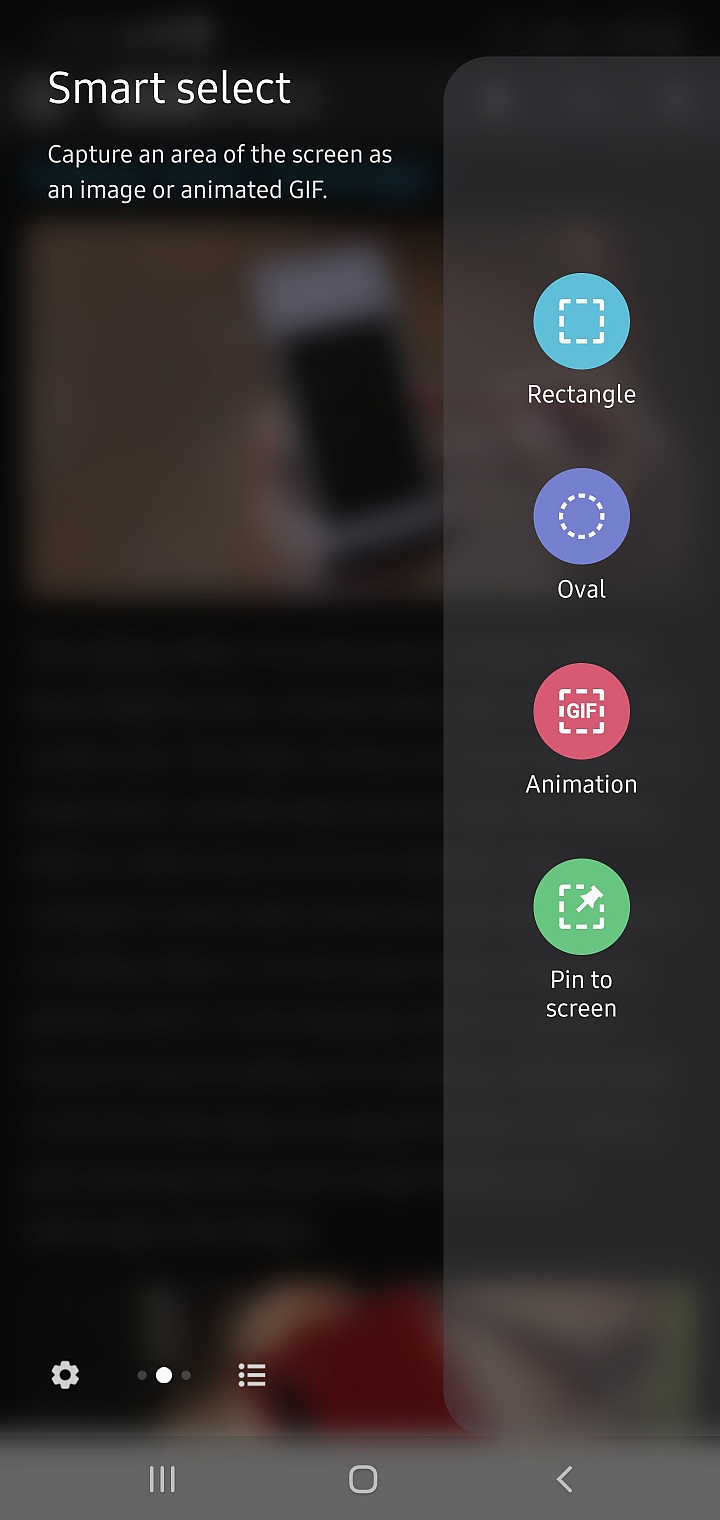
Step 3: Here, you can choose the shape of the selection tool. Tap on the option you want to use, then resize the selection window to cover whatever it is you want to screenshot. Then, hit the Done button. If you select the Animated GIF option, hit the Record button instead.
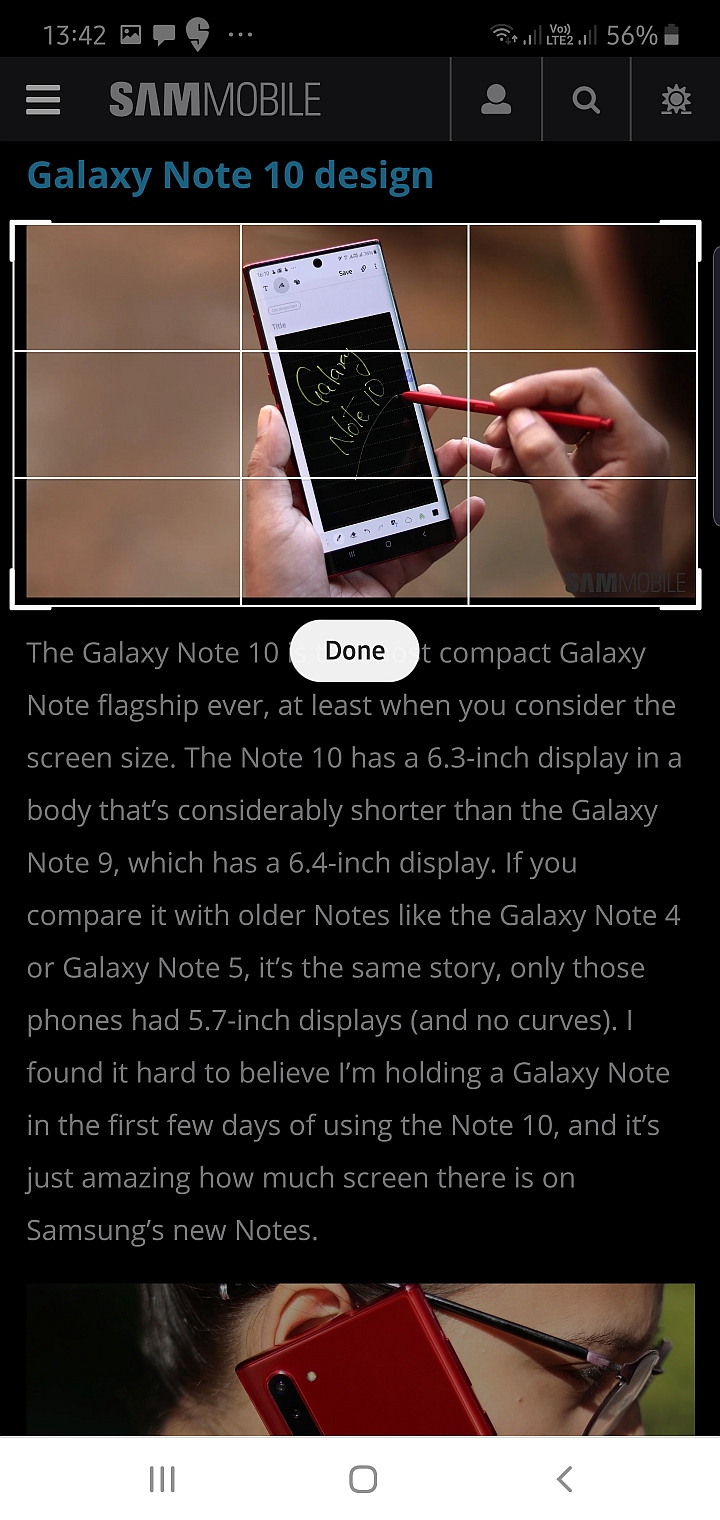
Step 4: You will be presented with the option to save the snippet/GIF to the gallery, share it, and draw on top of the screenshot. You can also hit the Extract text button to extract whatever text is in the screenshot and copy and paste it anywhere you like (you can’t extract text from GIF animations).

Smart select via S Pen’s Air Command menu:
Step 1: Open the content you want to screenshot/snip, then, to access the Air Command menu, take the S Pen out of its slot. The Air Command menu should pop up right away, but if it doesn’t, you can hit that small icon of a pen inside a circle that’s floating on the screen to manually open the Air Command menu.
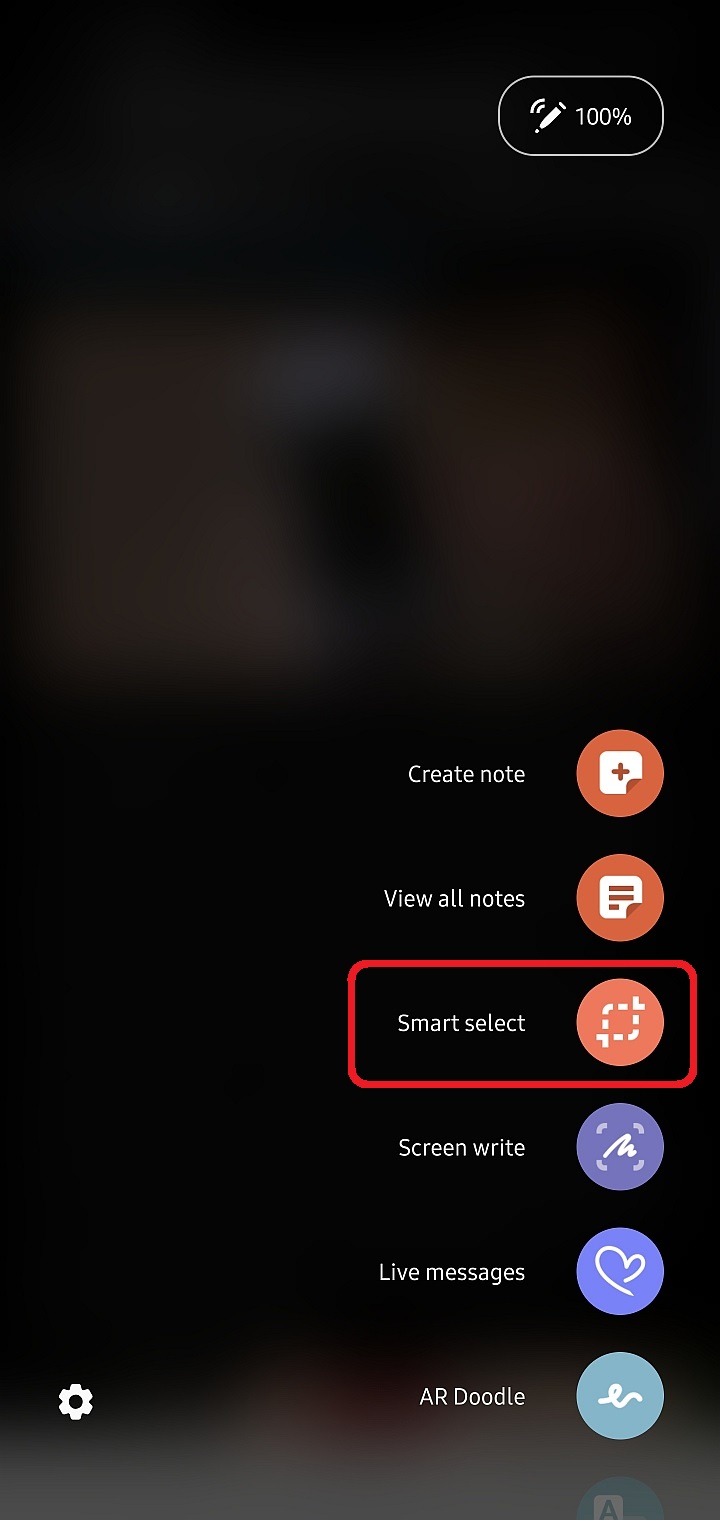
Step 2: Select the Smart select option.
Step 3: Choose the shape of the selection tool. Then, simply use the S Pen to cut out whatever it is on-screen that you want to capture.
Step 4: Once you have selected the necessary part and lift the S Pen from the display, you will be able to save the snippet to the gallery, share it, draw on top of the screenshot, and extract text, if any, from the screenshot. If you made a rectangular selection, you will also be able to pin the screenshot to the screen so that it shows on top of every app until you manually close it.
Smart write with the S Pen
This is an S Pen-exclusive screenshot method that lets you capture a screenshot of the onscreen content and then write and draw on it with the S Pen, with the option to select from different pen types and change the color and thickness of the chosen pen. Smart write is accessible via the Air Command menu that you get when the S Pen is taken out of its slot.
Here’s how you use it:
Step 1: Take the S Pen out of its slot to bring up the Air Command menu, or tap the icon of the pen inside a circle to bring up Air Command if you’re already using the stylus.

Step 2: Tap the Smart write option.
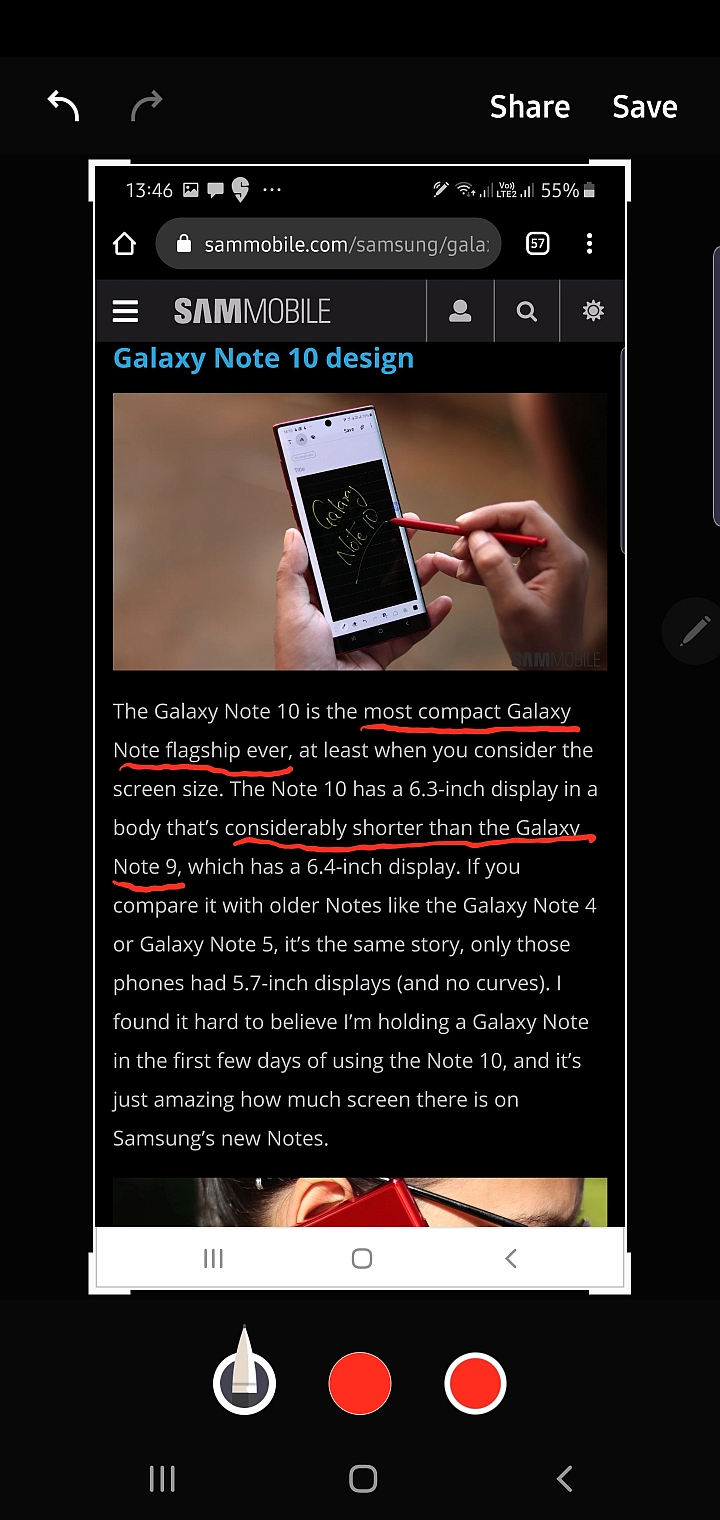
Step 3: The phone will immediately take a screenshot of whatever’s on the screen and present you the option to draw and write on it. You can change the pen type and the color and thickness of the font with the options shown below the screen.
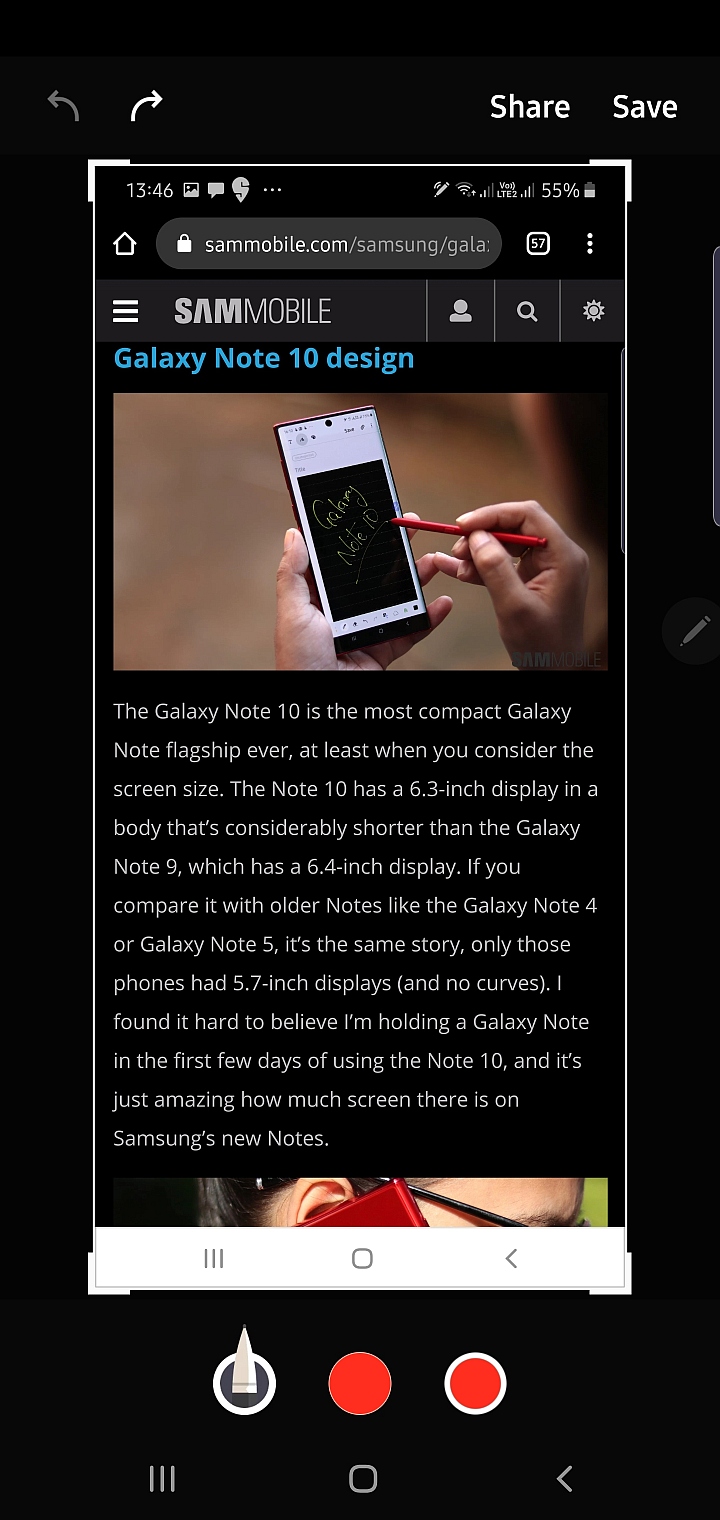
Step 4: Once you’re done, hit the Save button on the top of the screen to share the screenshot to the gallery or hit the Share button to share it with other apps.

The post How to take a screenshot on the Galaxy Note 10 appeared first on SamMobile.
from SamMobile https://ift.tt/2ZJeKpX
via IFTTT


ليست هناك تعليقات:
إرسال تعليق